BigQuery Connection Guide
1. Get BigQuery Credentials
To connect BigQuery with SimplyPut, you’ll need 3 main credentials. We’ll walk you through how to get each credential below.
1️⃣ Locate your Project ID and Dataset
Navigate to the BigQuery project where your data is. You can find the Project ID at the top level of the Explorer tab. In the “Project and DataSet” image below, the Project ID is testing-datasets-363321 .
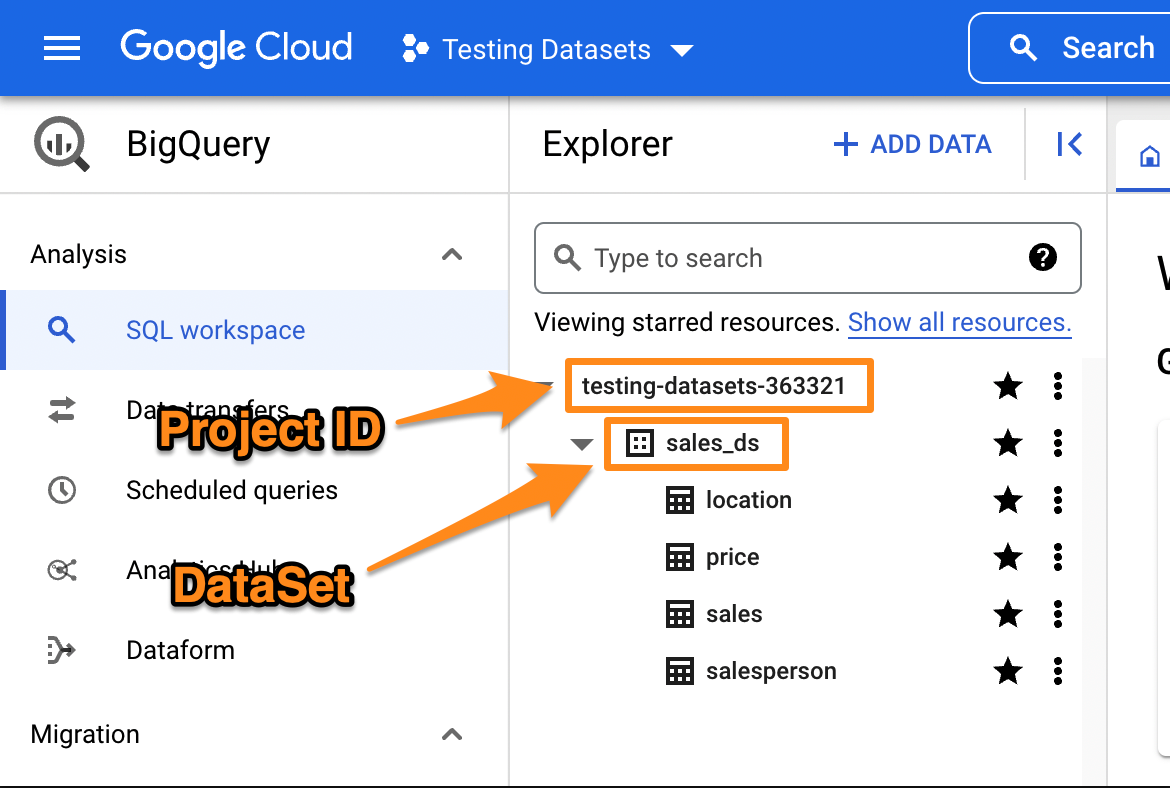
Dataset
You can choose the Dataset nested under the Project ID. In the “Project and DataSet” image below, we’ve chosen the sales_ds Dataset. Note you might have multiple Datasets for your project - choose the one which has the underlying tables you’d ultimately like to ask questions about.
2️⃣ Create a Service Account and JSON Key
The last required credential is the JSON key of a service account that has access to the BigQuery project. To create a service account, please follow the steps below.
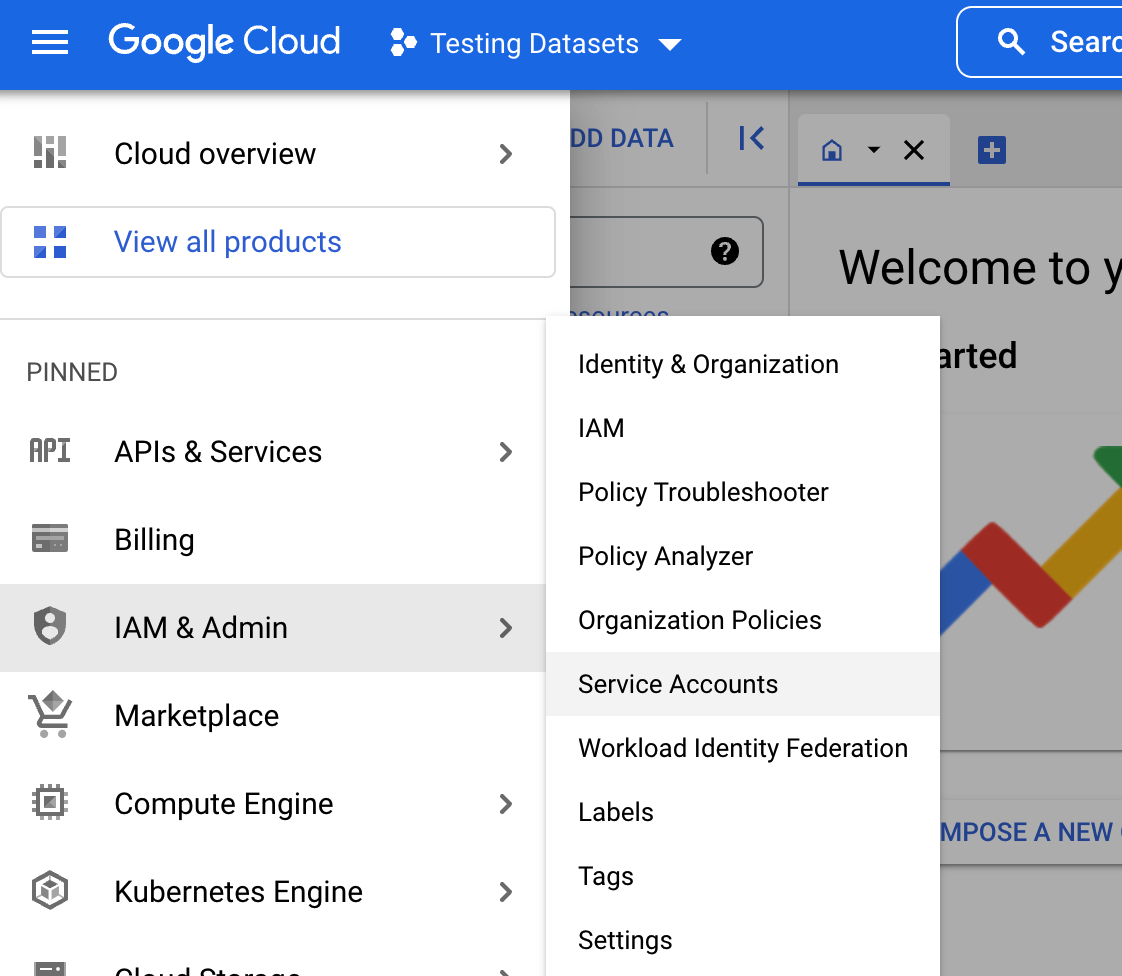
Navigate to IAM & Admin
First navigate to IAM & Admin and then to Service Accounts in the Google Cloud Console Navigation Menu.

Create Service Account
Click the Create Service Account button.

Create a service account
Create a service account to grant access to SimplyPut.
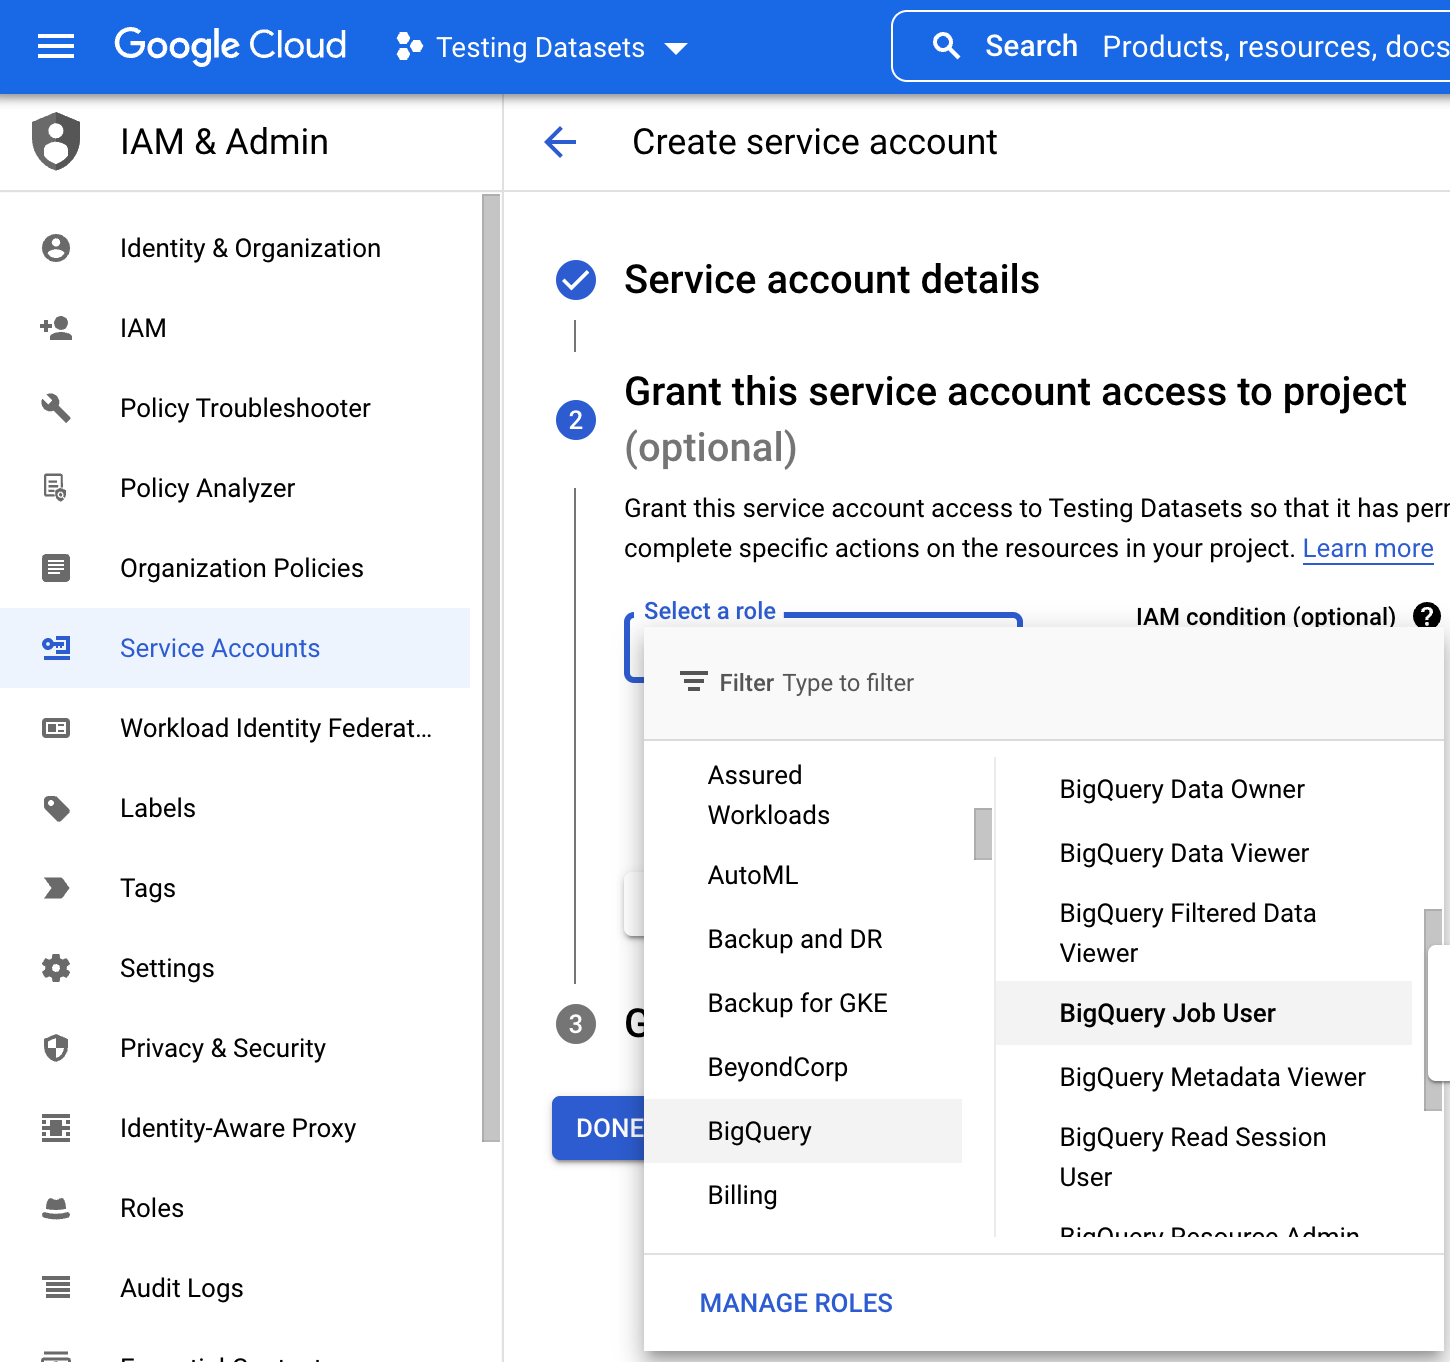
Grant BigQuery Job User Access
In Step 2 of the Create service account flow grant BigQuery Job User access to the service account as in the below and then hit Done.
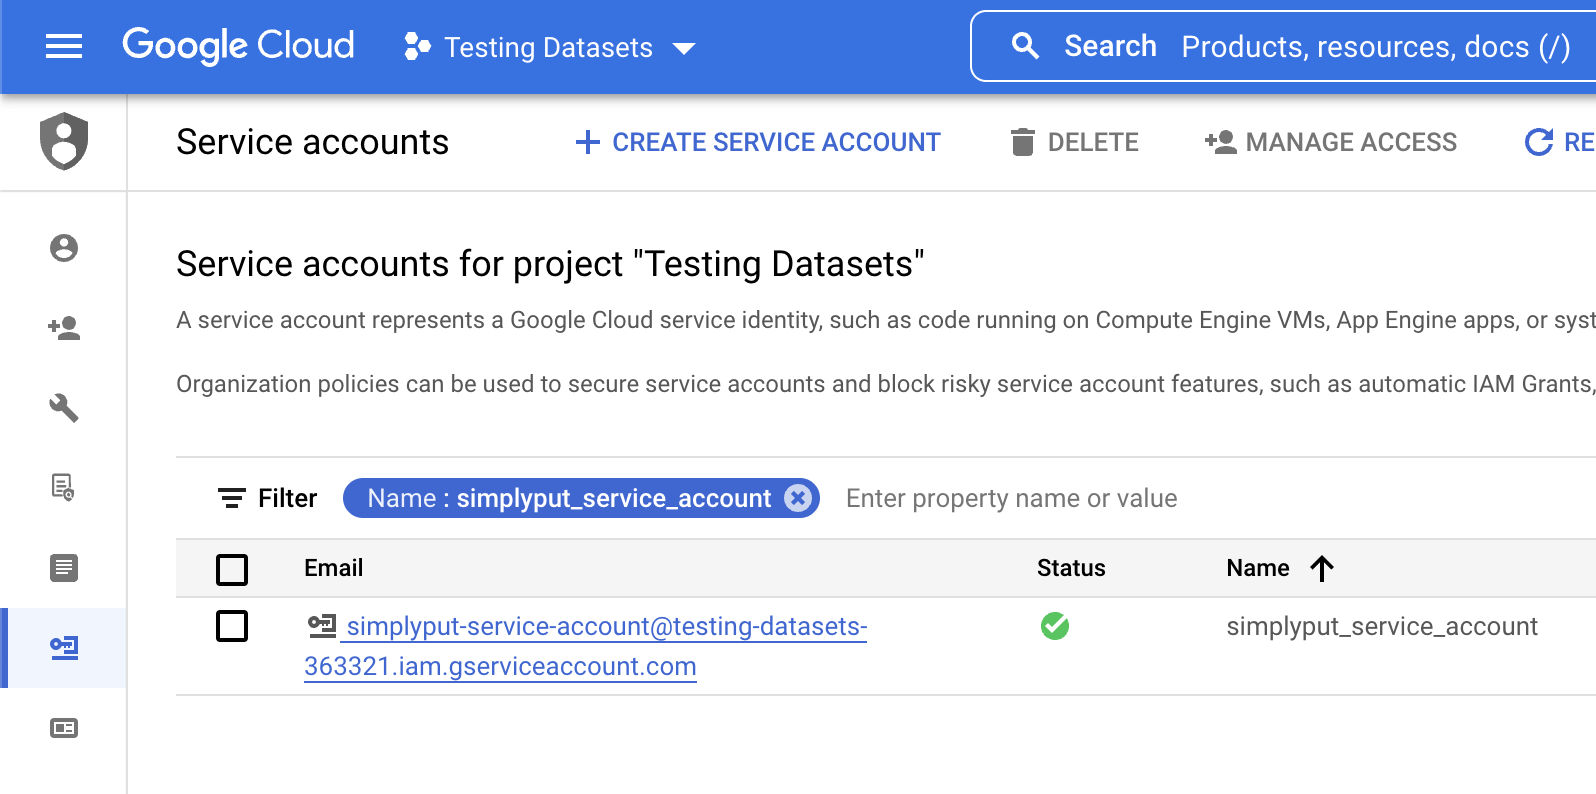
Click on the Created Service Account
Now click on the created service account.

Create a JSON Key
Click on Keys tab and create a JSON key as in the below.
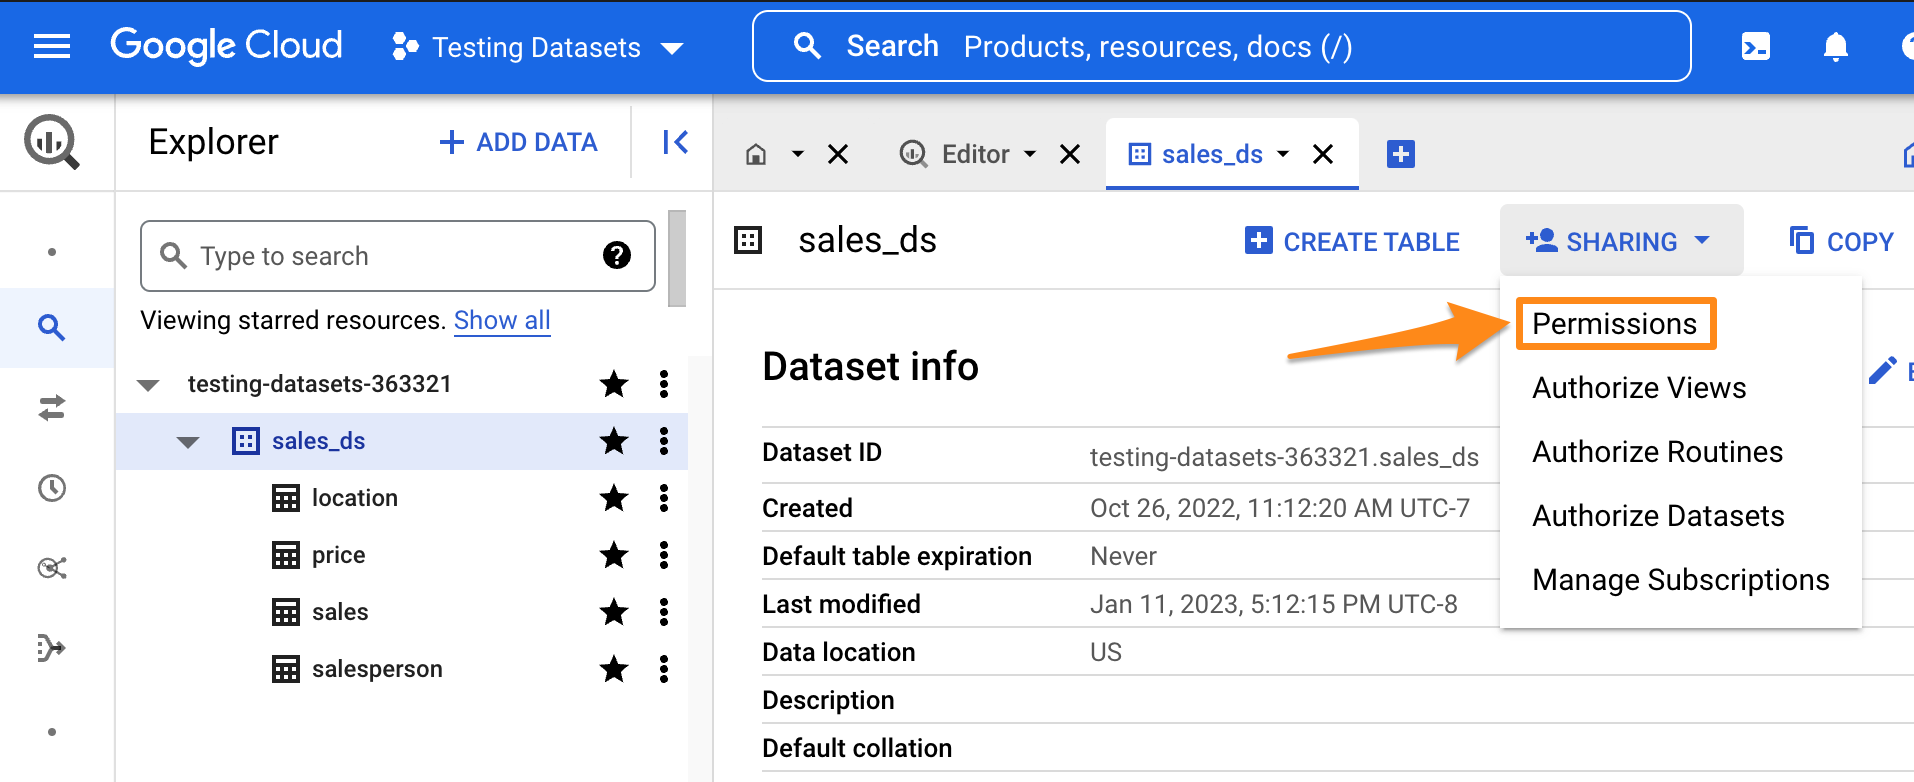
Grant Access to Dataset
Select the Dataset in the Explorer tab and then click Permissions under the Sharing dropdown.
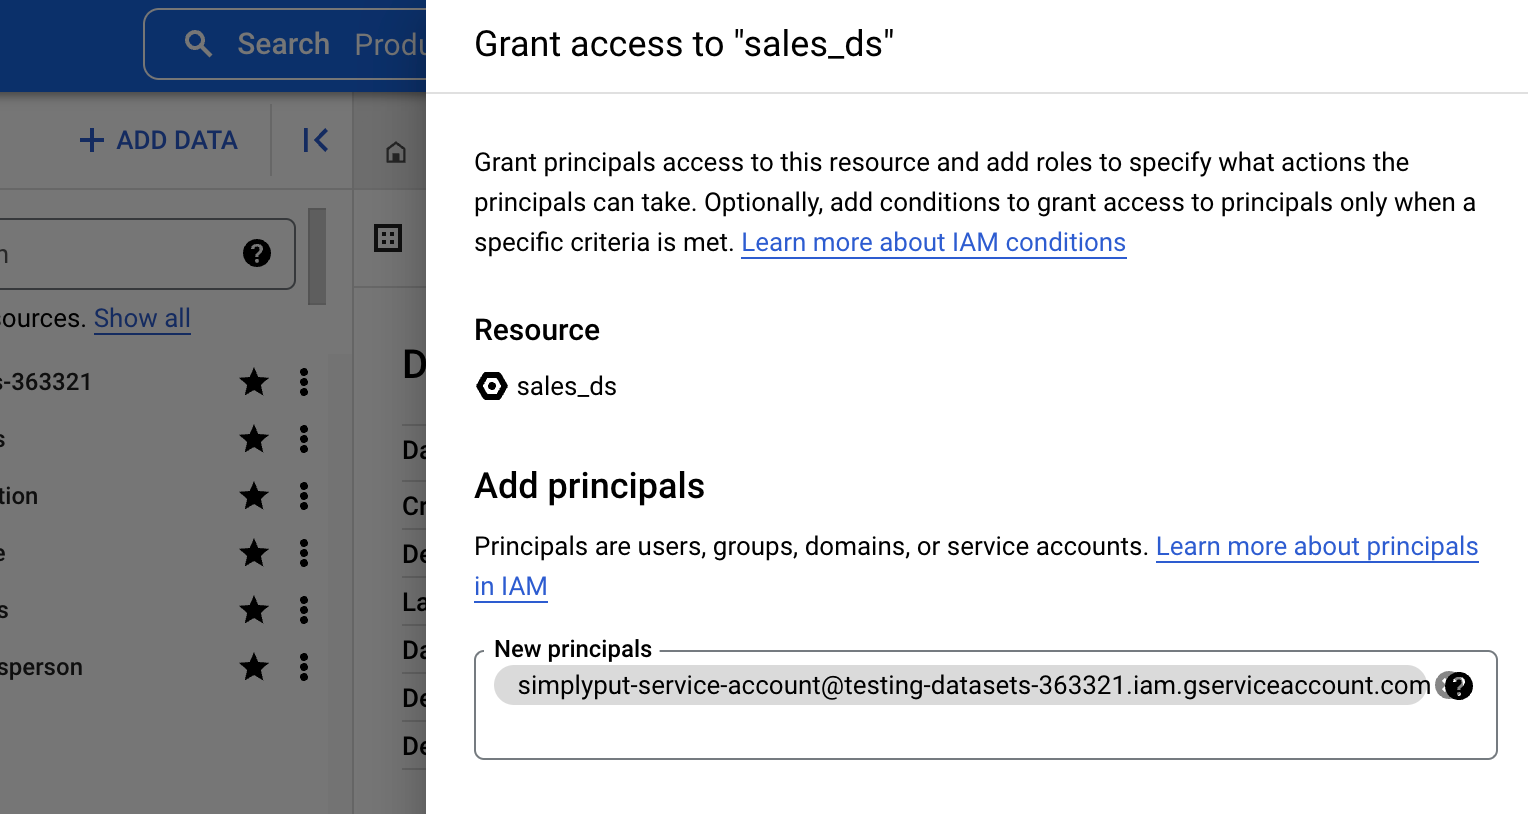
Add Service Account to New Principals
Add the name of your service account to New Principals.
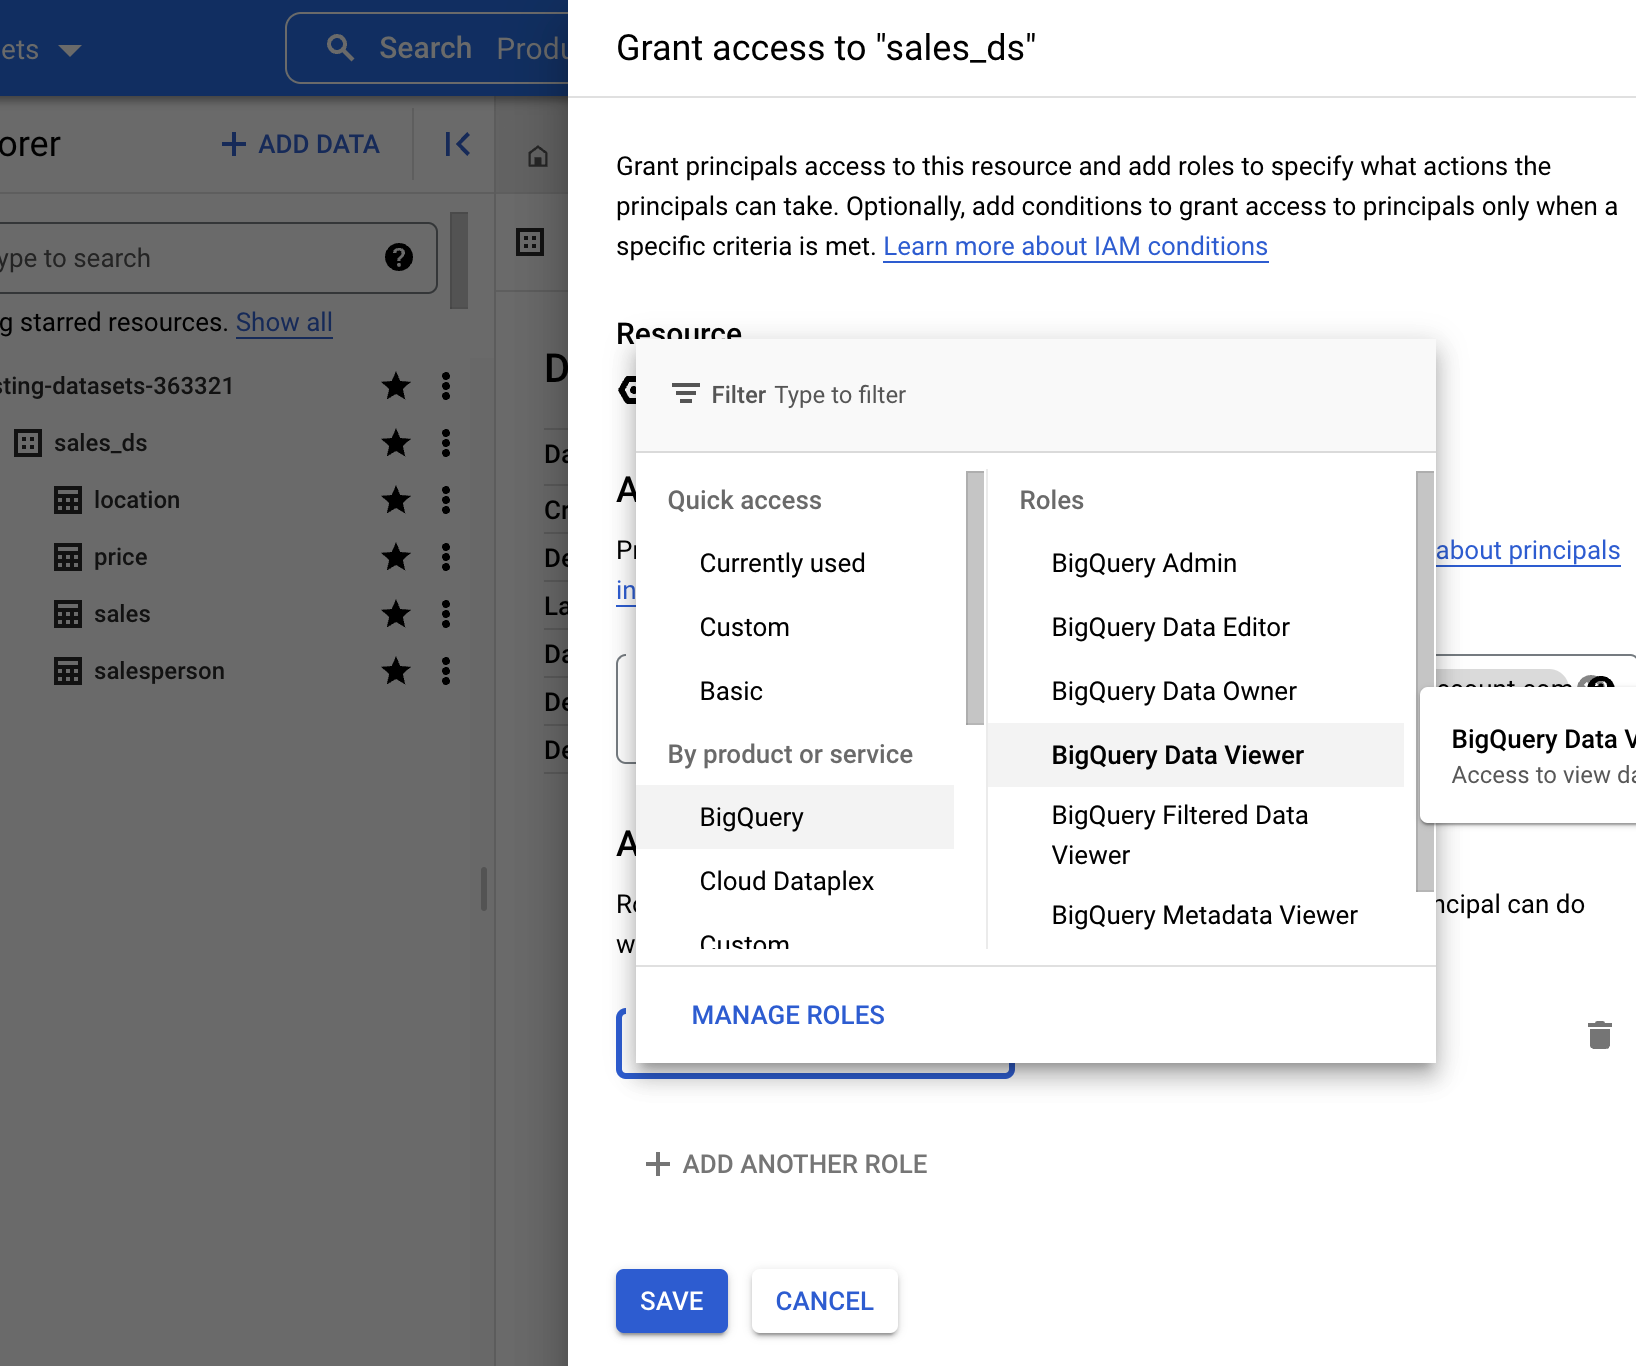
Assign BigQuery Data Viewer Role
Assign the BigQuery Data Viewer role.
3️⃣ Upload Credentials to SimplyPut
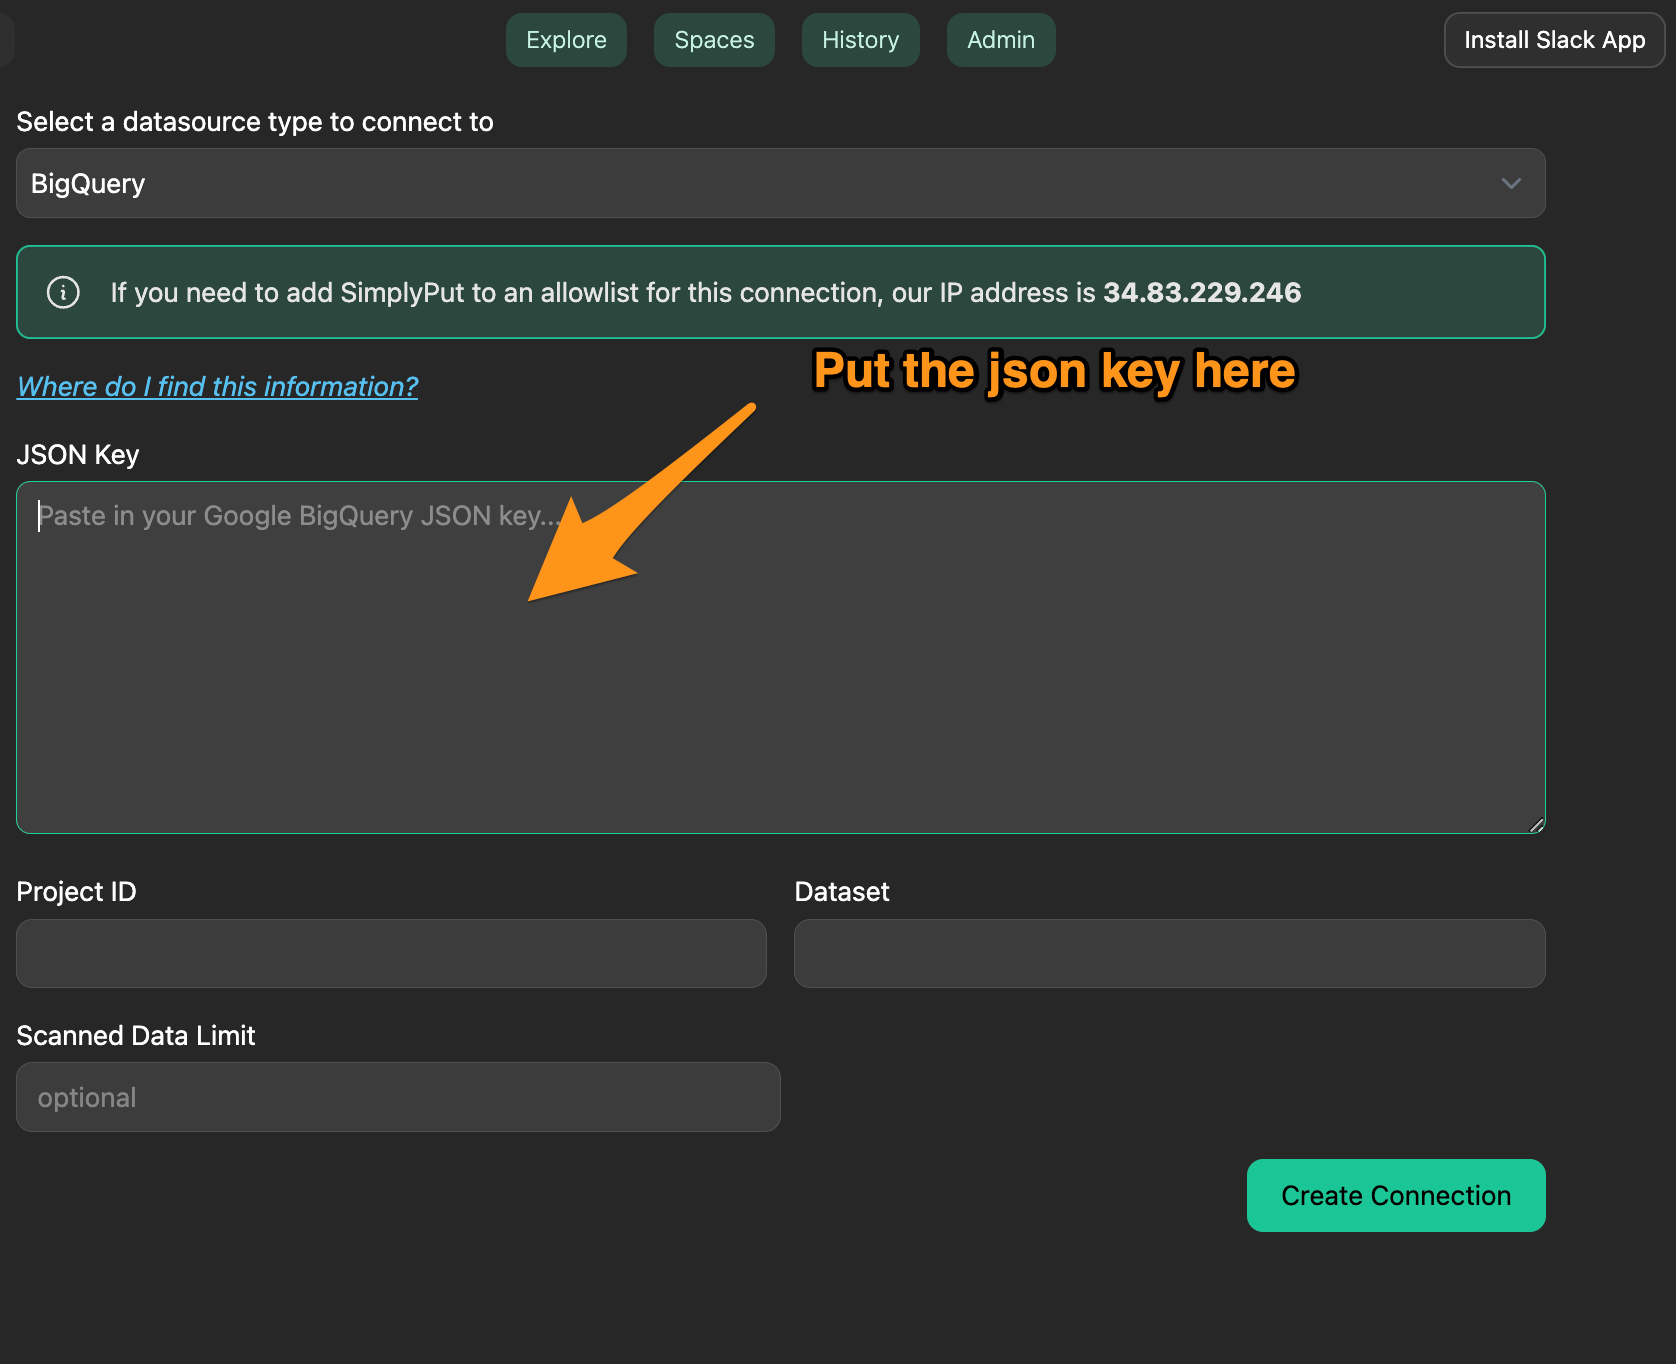
Assign BigQuery Data Viewer Role
Input the the credentials into the BigQuery credential uploader as in the below. You’re good to go!
Appendix: Enabling Private IP Requests in BigQuery from a VPC (in case you need to)
1. Enable Private Google Access for your VPC network:
- Go to the Google Cloud Console: https://console.cloud.google.com/
- Navigate to VPC Networks under Networking > VPC Network.
- Click on the name of the VPC network you want to modify.
- Click on "Edit" at the top of the page.
- Scroll down to the "Private Google Access" section.
- Select "On" for the "Private Google Access" option.
- Click "Save" to save the changes.
2. Create a Cloud NAT Gateway (if you don't have one) to allow instances without an external IP address to send traffic to Google APIs and services:
- Go to the Cloud NAT page in the Google Cloud Console: https://console.cloud.google.com/networking/nat
- Click "Create NAT Gateway".
- Enter a name for your NAT gateway.
- Select the region and VPC network where you want to create the NAT gateway.
- Configure the Cloud Router, IP addresses, and other settings as needed.
- Click "Create" to create the NAT gateway.
3. Configure BigQuery connections:
- Go to the BigQuery Console: https://console.cloud.google.com/bigquery
- Click on your project name and then click on "Project settings".
- Under "Data access", click "VPC Service Controls".
- Click "Add VPC Service Controls".
- Select the VPC network you enabled Private Google Access for.
- Click "Add" to apply the VPC Service Controls to BigQuery.
Now, BigQuery will be able to receive private IP in the request to access from your VPC network. Instances with private IP addresses in your VPC can access BigQuery securely without an external IP address.